When it comes to eyeshadow, there are endless possibilities when creating a look. You can go with a simple all-over color or create a more dramatic look. But, if you’re looking for something different, why not try an ombre eyeshadow look? This look is easy to create and can be customized to fit your style. Keep reading for instructions on how to create this look yourself!
Eye-catching ombre eye shadow looks for your next special occasion
This ombre eyeshadow lookbook will show you how to create gorgeous gradient eyeshadow looks using some of the best colors out there. From natural hues to bright and bold shades, these ombre eyeshadow looks are easy to recreate and wearable for any occasion.
To get started, you’ll need a few key makeup products. First, you’ll need a good eyeshadow primer to help your eyeshadow stay in place and prevent creasing. Next, choose a light and dark eyeshadow color that complement each other well. We also recommend having a medium-sized fluffy blending brush on hand to help blend the colors seamlessly.
Once your products are gathered, follow the tutorial below to learn how to create four different ombre eyeshadow looks. With a little practice, you’ll be a pro at creating this trendy eyeshadow style in no time!
Ombre Eyeshadow Look #1: The Natural Look
For a natural and understated ombre eyeshadow look, start by applying the light eyeshadow color all over your lid. Then, use the dark eyeshadow color to fill in your crease. Next, use a blending brush to blend the two colors until there are no harsh lines. Finish off the look by applying some mascara, and voila! You’ve just created a beautiful, natural-looking gradient eye.
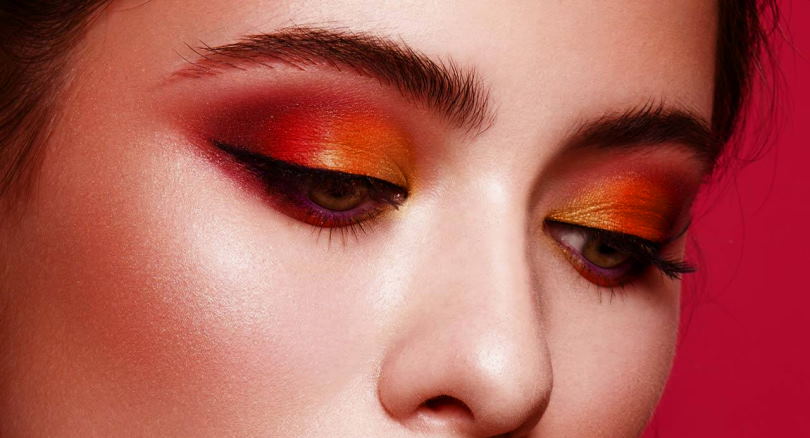
Ombre Eyeshadow Look #2: The Bold Look
If you’re feeling bold, try this dramatic ombre eyeshadow look. Start by applying the dark eyeshadow color all over your lid. Then, use the light eyeshadow color to create a halo effect around your pupil. Next, use a blending brush to blend the colors and ensure no harsh lines. Finally, finish off the look with some mascara and false lashes for extra drama!
Ombre Eyeshadow Look #3: The Smoky Look
For a smoldering and sexy ombre eyeshadow look, start by applying the dark eyeshadow color along your upper and lower lash lines. Then, use the light eyeshadow color to fill in your lid. Next, use a blending brush to blend the colors and ensure no harsh lines. Finally, finish off the look with some mascara and false lashes for extra drama!
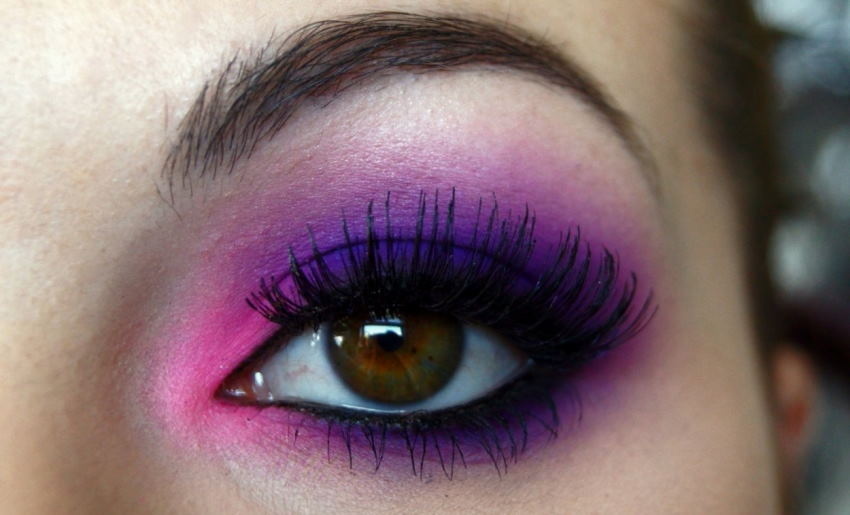
Ombre Eyeshadow Look #4: The Glittery Look
Want to add a little sparkle to your ombre eyeshadow look? Start by applying a glittery eyeshadow primer all over your lid. Then, use the light eyeshadow color to fill in your lid. Next, use the dark eyeshadow color to create a halo effect around your pupil. Next, use a blending brush to blend the colors and ensure no harsh lines. Finally, finish off the look with some glittery mascara and false lashes for extra sparkle!
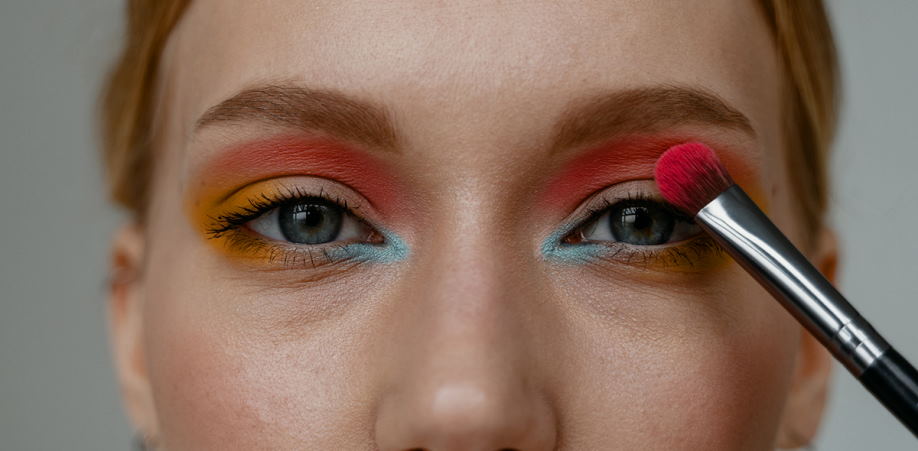
Colorful gradient eye makeup tutorial
This tutorial will show you how to create a colorful gradient eye makeup look.
- First, apply a light eyeshadow color to your entire eyelid.
- Then, use a darker eyeshadow color to create a V-shape at the outer corner of your eye.
- Finally, blend the two colors for a seamless finish.
To start, prime your eyelids and apply a light eyeshadow shade over the lid. We’re using a white shadow to make the colors pop. Next, take a dark eyeshadow shade and apply it to the crease of your eye, creating a V-shape at the outer corner. Then, use a smaller brush to blend the shadow outwards. Finally, take a third, lighter eyeshadow shade and apply it to the inner corner of your eye. This will help brighten up the whole look. Finally, use a clean brush to blend all three colors until there are no harsh lines. And that’s it! You’ve now created a beautiful gradient eye makeup look.